Tuesday, March 19, 2024

Revive Your Home for Spring with This Spring Home Maintenance Checklist


Spring Home Maintenance Checklist
HOME ORGANIZATION & DECLUTTERING

Revive Your Home for Spring with This Spring Home Maintenance Checklist

As the snow melts and the days grow longer, spring emerges as a time of renewal and rejuvenation. This sense of renewal extends to our homes, making it the perfect season for spring home maintenance. Embarking on house maintenance in spring not only prepares your living space for the warmer months ahead but also helps in identifying and addressing any damages caused by winter. Here, we dive into the importance of spring maintenance, outline a comprehensive spring maintenance checklist, and provide tips on how to clean a messy spring house, ensuring your home is refreshed and revitalized for the season.

Why is Spring Home Maintenance Important?

Spring home maintenance is crucial for several reasons. Firstly, it's an opportunity to assess and repair any winter damage. The cold months can be harsh on a home, with snow, ice, and freezing temperatures potentially affecting its structure and systems. Secondly, spring maintenance helps in enhancing your home's efficiency. Sealing gaps, insulating pipes, and servicing your HVAC system can lead to significant energy savings. Lastly, a well-maintained home provides a healthier living environment, reducing the risk of allergies and improving indoor air quality.

Spring Home Maintenance

What Parts of Your House Need to be Maintained Every Year?

Virtually every part of your home can benefit from annual maintenance, yet some areas demand particular attention in spring. The exterior walls and roof should be inspected for any signs of damage or wear, such as loose or missing shingles and cracks in the siding, which are crucial to address to maintain the integrity of your home.

Gutters and downspouts need to be cleared of debris to ensure water is effectively directed away from your home's foundation, preventing potential water damage. Windows and doors require a check for seals and weather-stripping to identify any leaks or gaps that could allow drafts or pests to enter.

The HVAC system, a vital component for your home's comfort, should be professionally serviced to ensure it is running efficiently and to extend its lifespan. Landscaping also plays a role in spring maintenance, with tasks such as pruning overgrown vegetation, removing dead plants, and planning your spring planting to enhance your home’s exterior appeal and health. Finally, the foundation should not be overlooked; it's important to look for any cracks or signs of moisture that could indicate foundational issues, ensuring your home remains safe and stable.


Looking for a FREE Quote?

Our Dumpster Consultants are waiting to help you find an affordable solution to your waste disposal needs; we can't wait to help you with your project!


How Do You Maintain a House in Spring?

Maintaining your house in spring involves a systematic approach to ensure every part of your home is cared for. Here's a spring maintenance checklist to guide you through the process:

1. Inspect and Clean Gutters: Prevent water damage by ensuring your gutters are free of debris and draining correctly.

2. Check Roof Shingles: Winter weather can be tough on your roof. Replace any broken or missing shingles to avoid leaks.

3. Service Your HVAC: A professional HVAC service can improve your system's efficiency and extend its life.

4. Seal Windows and Doors: Keeping the elements out will increase your home's energy efficiency and comfort.

5. Test Smoke and Carbon Monoxide Detectors: Replace batteries and test these devices to ensure your home's safety.

6. Deep Clean and Declutter: A thorough clean can not only refresh your home but also give you the opportunity to declutter.

7. Prepare Your Garden: Clear out old growth and plan your garden for the coming season.

How Do You Clean a Messy Spring House?

Spring cleaning is a cornerstone of spring home maintenance. Start by decluttering each room, which can instantly make your space feel cleaner and larger. Tackle one area at a time, sorting items into categories: keep, donate, and discard. Once decluttered, deep clean from the top down, beginning with ceilings and light fixtures and ending with floors. Use environmentally friendly cleaning products where possible to maintain indoor air quality. Organizing as you go can also prevent future messes, making it easier to maintain a clean home throughout the year.

Maintaining the house by cleaning

The Impact of Spring Home Maintenance

Engaging in spring home maintenance not only revitalizes your living space but also protects your investment. By conducting a thorough spring maintenance checklist, you can identify potential problems before they become costly repairs, ensure your home is efficient and safe, and enhance your living environment. Furthermore, cleaning a messy spring house not only improves its aesthetic appeal but also contributes to a healthier, more enjoyable home.

As we welcome the warmth and renewal that spring brings, taking the time to perform spring home maintenance ensures our homes are prepared, protected, and primed for the season. From inspecting the exterior to deep cleaning interiors, these tasks rejuvenate our living spaces and enrich our quality of life. So, embrace the spirit of spring, and let the season of renewal extend to every corner of your home.

Monday, March 4, 2024

10 New Home Trends That Will Make Your Friends Jealous


10 New Home Trends
HOME IMPROVEMENT

10 New Home Trends That Will Make Your Friends Jealous

 (modified Mar 1, 2024)

In the ever-evolving world of home design, staying abreast of the latest trends is key to creating a space that not only reflects your unique style but also leaves a lasting impression on your guests. From the allure of new home decor trends to the enduring appeal of timeless home decor, this listicle explores the top ten trends that promise to inject a fresh vibe into your living spaces. Let’s dive into the world of chic and sleek designs that are sure to make your friends green with envy.

1. Biophilic Design

Embracing new home trends means inviting the outside in. Biophilic design focuses on integrating natural elements into your home to create a serene, life-affirming environment. Think large, sunlit windows, indoor plants, and natural wood finishes. This approach not only enhances the aesthetic appeal of your home but also promotes well-being.

2. Sustainable Materials

Sustainability is more than a buzzword in the realm of new home decor trends; it's a movement. Homeowners are increasingly opting for eco-friendly materials such as bamboo, reclaimed wood, and recycled metals. These materials offer both a timeless charm and a step towards a more sustainable lifestyle.

Trendy living space

3. Multifunctional Spaces

With the shift towards remote work and home-based activities, multifunctional spaces have emerged as a new home trend. Furniture that doubles as storage solutions and rooms that serve multiple purposes are becoming staples in modern homes, blending functionality with style.

4. Vintage Accents

Incorporating vintage accents is a nod to timeless home decor. Whether it’s a classic mid-century modern chair or an antique mirror, these pieces add character and history to your space, proving that some trends never go out of style.

5. Bold Wallpaper

Gone are the days of playing it safe with wall treatments. New home decor trends are all about bold, statement-making wallpaper. From geometric patterns to floral prints, wallpaper is an easy way to inject personality and drama into any room.


Looking for a FREE Quote?

Our Dumpster Consultants are waiting to help you find an affordable solution to your waste disposal needs; we can't wait to help you with your project!


6. Earth Tones

When it comes to color, earth tones are leading the charge in new home trends. Warm terracottas, serene greens, and deep blues are replacing stark whites and grays, creating environments that are calming and grounded.

7. Smart Home Features

Technology continues to redefine new home trends, with smart home features becoming a must-have for modern living. From smart thermostats to advanced security systems, integrating technology into your home not only adds convenience but also appeals to the tech-savvy.

8. Textured Fabrics

Texture is taking center stage in new home decor trends. Rich velvets, nubby linens, and chunky knits are

being used to add depth and interest to spaces, making them feel cozy and inviting.

9. Minimalist Kitchens

The heart of the home is getting a minimalist makeover. Sleek lines, handleless cabinets, and hidden appliances are defining the new home trends in kitchen design, emphasizing functionality and simplicity.

10. Outdoor Living Spaces

As people spend more time at home, creating comfortable outdoor living spaces has become a priority. This trend encompasses everything from outdoor kitchens to cozy fire pits, blurring the lines between indoor and outdoor living.

Trendy outdoor living space

What are timeless home design trends?

Timeless home decor trends stand out for their focus on simplicity, functionality, and elegance. Central to timeless home decor are neutral color palettes, natural materials like wood and stone, and classic furniture designs that defy the changing tides of fashion. By prioritizing natural light, open spaces, and minimalist aesthetics, these trends ensure your home remains stylish and welcoming, serving as a perfect backdrop to the ever-evolving new home trends.

What Are New Color Trends in Home Decor?

The forefront of new home decor trends is marked by a shift towards warmer, earthier tones complemented by bold and personal expressions of color. Deep blues, terracotta, sage green, and burnt orange are making waves, reflecting a desire for spaces that feel both contemporary and comfortable. These colors, indicative of the latest new home trends, offer a refreshing update from the cool neutrals of previous years, adding depth and character to modern interiors.

The world of home design is always evolving, with new home trends and new home decor trends emerging to reflect the changing lifestyles and preferences of homeowners. By embracing these trends, you can create a living space that is not only stylish and modern but also rich in timeless home decor elements that will stand the test of time.

So, why wait? Start incorporating these trends into your home today and get ready to make your friends jealous!

Friday, February 23, 2024

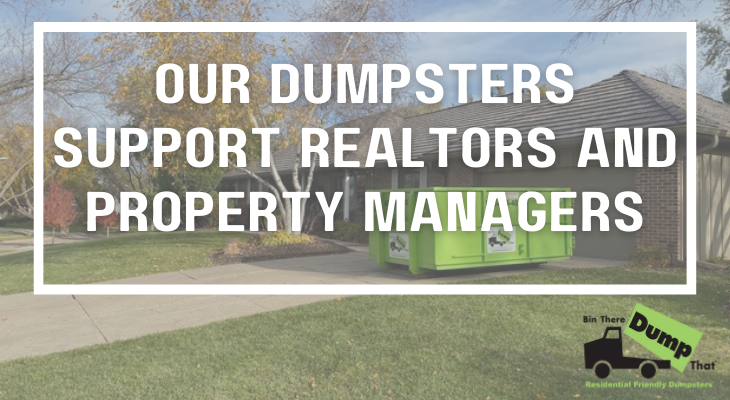
How Our Dumpsters Support Realtors and Property Managers: A Comprehensive Guide


Our Dumpsters Support Realtors & Property Managers
LIFESTYLE

How Our Dumpsters Support Realtors and Property Managers: A Comprehensive Guide

In the fast-paced world of real estate and property management, efficiency and cleanliness play pivotal roles in maintaining property value and attracting potential buyers or tenants. Bin There Dump That understands the unique needs of realtors and property managers, offering tailored dumpster rental solutions that simplify waste management during property cleanouts, renovations, or routine maintenance.

This article explores how our dumpsters serve as essential realtor property resources and property management resources, streamlining operations and ensuring properties remain pristine and appealing.

What is a Property Manager?

A property manager is a professional or company responsible for the day-to-day operations of a real estate property on behalf of the owner. Their duties can range from finding and screening tenants, collecting rent, and handling maintenance issues to overseeing contractors and ensuring compliance with laws and regulations. Effective property management is crucial for preserving the property's value and ensuring tenant satisfaction.

Real Estate Agent Resources

How Much Does Property Managing Cost?

The cost of property management varies depending on several factors, including the property size, location, and the range of services required. Generally, property managers charge a monthly fee, which is a percentage of the rental income, typically ranging from 8% to 12%. Additional fees may apply for tenant placement, maintenance work, and other administrative services.

Enhancing Real Estate Operations with Dumpster Rentals

In the bustling world of real estate and property management, the importance of streamlined cleanouts and renovations cannot be overstated. Quick and easy disposal of waste is crucial for keeping projects on schedule, and with Bin There Dump That, this becomes effortlessly achievable.

Our dumpsters are available in a variety of sizes, making it simple for realtors and property managers to find the perfect fit for any project, be it a thorough property cleanout, an extensive renovation, or minor repairs. Moreover, the appeal of a property is significantly enhanced when it's clean and clutter-free, a key factor that attracts potential buyers and renters alike.

Utilizing our dumpster services facilitates the efficient removal of unwanted items, thereby boosting curb appeal and, ultimately, the value of the property. Recognizing the dynamic nature of the industry, we offer flexible rental periods tailored to the unique timelines of your projects. Whether you need a dumpster for a quick weekend cleanout or require one for a longer renovation project, our service is designed to accommodate your needs, ensuring that waste management is one less thing to worry about.


Looking for a FREE Quote?

Our Dumpster Consultants are waiting to help you find an affordable solution to your waste disposal needs; we can't wait to help you with your project!


Benefits for Realtors and Property Managers

In today’s fast-paced real estate and property management sectors, the benefits of using Bin There Dump That's dumpster rental services extend far beyond just waste removal. Our commitment to providing a seamless experience, cost efficiency, and environmental responsibility makes us the go-to choice for professionals looking to enhance their operations. Here’s how our services make a difference:

  • Convenience: Our dumpster rental process is designed for ease and efficiency. We deliver and pick up the dumpsters at your convenience, saving you time and hassle.
  • Cost-Effective: By optimizing waste management with our dumpsters, realtors and property managers can reduce project downtime and labor costs, ultimately improving the bottom line.
  • Eco-Friendly Disposal: We're committed to responsible waste management. Our team ensures that debris is disposed of in an environmentally friendly manner, aligning with sustainability goals.

Realtor Property Resources and Property Management Resources

Our dumpsters serve as invaluable assets for realtors and property managers, significantly enhancing the efficiency of property maintenance, renovations, and cleanouts. Partnering with Bin There Dump That opens up a world of possibilities for professionals within the real estate sector, offering access to a suite of bespoke services. We pride ourselves on delivering customized dumpster rental solutions that are meticulously tailored to meet the distinct needs of your property management or realty business.

Green Dumpster on Driveway

Our team is on hand to provide expert advice, guiding you towards selecting the most appropriate dumpster size and rental period for your specific projects, ensuring an optimal balance between cost-efficiency and operational effectiveness. Above all, our commitment to providing reliable service and support stands paramount. We ensure that our dumpsters are delivered and picked up according to your schedule, facilitating a smooth continuation of your projects without any unnecessary delays.

Elevating Success With Bin There Dump That

For realtors and property managers, maintaining clean and well-managed properties is essential for success. Bin There Dump That's dumpster rental services offer a practical and efficient solution for waste management, supporting the real estate industry in managing properties effectively. Our commitment to convenience, cost-effectiveness, and eco-friendly practices makes us a trusted partner for realtors and property managers seeking to enhance their operations and property appeal.


Friday, February 16, 2024

12 Jaw-Dropping Clutter Statistics That Will Make You Want to Declutter Today!


Clutter Statistics That Will Make You Declutter
HOME ORGANIZATION & DECLUTTERING

12 Jaw-Dropping Clutter Statistics That Will Make You Want to Declutter Today!

Clutter has a way of creeping into our lives, slowly but steadily taking over our spaces and minds. The impact of clutter is more significant than you might think, affecting not just our physical surroundings but also our mental well-being. In this article, we will explore some eye-opening clutter statistics that highlight the need for decluttering and delve into essential questions about how to start decluttering your home, the number of people affected by clutter, the average amount of clutter in homes, and the difference between clutter and hoarding.

1. The Clutter Epidemic

Over 80% of individuals find themselves grappling with stress and anxiety directly linked to the clutter in their living spaces. This statistic emphasizes the pervasive impact of clutter on mental well-being.

2. The Average Amount of Clutter

Within the average American home lies a staggering 300,000 items, showcasing the extent to which possessions accumulate and contribute to a cluttered environment.

3. The Financial Impact

Annually, Americans invest approximately $2.7 billion in storage units, underlining the financial strain clutter imposes as individuals seek solutions to accommodate their excess belongings.

4. Clutter and Mental Health

Studies illuminate a direct correlation between a cluttered home and elevated cortisol levels, resulting in heightened anxiety and disturbances in sleep patterns.

Cluttered Room

5. Poor Eating Choices

In cluttered environments, individuals are prone to making unhealthy eating choices, a phenomenon reflected in statistics. Those residing in extremely cluttered homes face a staggering 77% higher likelihood of being overweight. This correlation between clutter and dietary decisions highlights the interconnectedness of physical surroundings and lifestyle choices.

6. Clutter Causes More Housework

Eliminating clutter is a game-changer for housework, as it accounts for a remarkable 40% reduction in tasks within the average home. This statistic underscores the significant impact decluttering can have on streamlining daily chores and creating a more manageable living environment. It emphasizes the transformative benefits of simplifying living spaces, not just for aesthetic reasons but also for the practical advantage of minimizing the time and effort invested in household upkeep.

7. Overwhelming Amount of Clutter

Over half of Americans, specifically 54%, express feeling overwhelmed by the clutter in their lives. Surprisingly, a significant 78% of individuals admit to having no clear idea about how to tackle and manage the excess belongings that contribute to this overwhelming clutter.


Looking for a FREE Quote?

Our Dumpster Consultants are waiting to help you find an affordable solution to your waste disposal needs; we can't wait to help you with your project!


8. Environmental Impact of Clutter

Beyond personal and financial considerations, clutter significantly contributes to environmental issues. The production and disposal of excess consumer goods result in increased waste and energy consumption, further emphasizing the imperative of adopting sustainable decluttering practices.

9. Digital Clutter

In the digital age, clutter extends beyond physical spaces. The average person receives around 121 emails daily, contributing to digital clutter and decreased productivity. Additionally, the average American accumulates over 1,000 digital files on their computer, emphasizing the necessity of organizing virtual spaces.

10. Social Impact

Cluttered living spaces can strain relationships, with couples engaging in approximately three arguments per month related to clutter. Furthermore, family members in cluttered environments report higher stress levels and decreased overall life satisfaction, highlighting the broader social impact of clutter.

Cluttered Closet

11. Decluttering Challenges

Over 65% of individuals admit to feeling sentimental about possessions, making it challenging to part with items contributing to clutter. Time constraints also hinder decluttering efforts, with 47% of individuals citing a lack of time as the primary obstacle to tackling clutter.

12. Long-Term Maintenance

Studies on habit formation indicate that it takes an average of 66 days for decluttering behaviors to become automatic. This underscores the importance of consistent efforts in establishing decluttering habits for long-term success. Individuals who engage in regular decluttering routines report increased feelings of control and reduced stress over time, highlighting the transformative impact of sustained efforts.

What is the difference between Clutter and Hoarding?

While clutter and hoarding may seem synonymous, it's essential to distinguish between the two. Clutter refers to a disorganized collection of items that impairs the functionality of a space. In contrast, hoarding is a more severe mental health disorder characterized by the excessive accumulation of items and a reluctance to discard them, often leading to unsafe living conditions.

What These Clutter Statistics Mean

The clutter statistics paint a vivid picture of the pervasive impact of clutter on our lives. Decluttering is not just about creating a visually appealing space; it's a crucial step towards improving mental well-being and reclaiming control over our surroundings. Start small, set achievable goals, and embark on a journey to declutter your home today. Your mind and living space will thank you.

Thursday, February 8, 2024

Unlocking Space: The Complete Guide on Pocket Door Installation

 HOME IMPROVEMENT & DIY

Unlocking Space: The Complete Guide on Pocket Door Installation

In the modern world where space is at a premium, pocket doors have become a popular choice for both residential and commercial properties. The elegance and space-saving features of a sliding pocket door make it an ideal option for those looking to maximize their interior space.

This comprehensive guide aims to provide you with detailed insights on pocket door installation, addressing common queries like how to install a pocket door in an existing wall, the feasibility of installation in a 2x4 wall, and the potential disadvantages of pocket doors.

Understanding Pocket Door Installation

Pocket door installation is a process that involves creating a space within the wall for the door to slide into when opened. Unlike traditional hinged doors, a sliding pocket door disappears into a compartment in the adjacent wall, thereby saving valuable floor and wall space.

This feature makes them particularly useful in tight areas or in rooms where a swinging door would be impractical. Additionally, the seamless integration of pocket doors into wall cavities allows for a more streamlined and unobstructed aesthetic, enhancing the overall design and functionality of the space.

Pocket Door Wall Debris

Can You Install a Pocket Door in an Existing Wall?

One of the most common questions regarding how to install a pocket door revolves around the feasibility of installing it in an existing wall. The answer is yes, you can install a pocket door in an existing wall, but it requires careful planning and precision.

The process involves removing a portion of the wall to create space for the door pocket. This demolition will inevitably result in a significant amount of debris, including chunks of drywall and old framing materials. Considering this, it's advisable to plan for construction cleanup by booking a dumpster rental. Having a dumpster on-site will facilitate efficient and easy cleanup, ensuring that the work area remains safe and uncluttered.

This task can be more challenging in load-bearing walls or walls with electrical wiring and plumbing. Therefore, it is often recommended to consult a professional to assess the viability and to ensure a safe installation.

Installing Pocket Door in a 2x4 Wall

Another frequent inquiry is whether a pocket door can be installed in a 2x4 wall. It is indeed possible to install a pocket door in a 2x4 wall, but there are considerations to be made. The standard thickness of a pocket door frame is designed to fit into a 2x6 wall.

Therefore, when installing in a 2x4 wall, one must either use a thinner door or build out the wall to accommodate the standard pocket door hardware. This may involve additional construction work but is entirely achievable with the right approach and tools.

Pocket Door Installation

Step-by-Step Guide on How to Install a Pocket Door

1. Preparation

The initial step in pocket door installation involves careful planning and assessment. Start by determining the ideal location and size for your pocket door. This is crucial as it dictates the amount of space needed within the wall. Use a stud finder to locate studs and ensure there are no obstructions like electrical wiring, plumbing, or HVAC ducts in the area where the pocket will be created. If any such obstructions are found, you may need to relocate them or reconsider the door's placement.

2. Framing the Wall

For an existing wall, the process involves more complexity. Carefully mark and cut out the required section of the wall. This usually means removing drywall and possibly some studs, followed by creating a new framed opening for the pocket door. In new construction, frame the wall according to the size specifications of the pocket door kit. Ensure that the framing is sturdy and square, as this will support the door and its mechanisms.

3. Installing the Pocket Door Frame

After preparing the opening, the next step is to install the pocket door frame. This frame is a crucial component as it houses the door when it is open. Position the frame in the prepared space, making sure it is perfectly level and plumb. Use shims where necessary to achieve the correct alignment. Secure the frame to the surrounding studs using screws or nails as specified by the frame manufacturer. Double-check the frame's alignment after securing it, as any misalignment can cause issues with the door's operation.

4. Adding the Door

With the frame in place, it's time to hang the sliding pocket door. Start by attaching the hanging hardware to the top of the door. Lift the door and carefully place the rollers into the track on the frame. Ensure the door slides smoothly back and forth in the track. If any adjustments are needed, use the adjustment screws on the rollers to align the door properly within the frame. Check the door's operation several times to ensure it moves freely and doesn't rub or stick against the frame.

5. Finishing Touches

The final step is to complete the wall finishes around the new pocket door. This might involve installing drywall, plaster, or other wall finishes to seamlessly integrate the pocket door frame into the existing wall. Once the wall finish is complete, you can add trim around the door to match the existing style of the room. Lastly, apply paint, wallpaper, or other finishes as desired to blend the new installation with the room's overall aesthetic. Remember to also install any door handles, locks, or pulls according to your design preferences and functional needs.


Looking for a FREE Quote?

Our Dumpster Consultants are waiting to help you find an affordable solution to your waste disposal needs; we can't wait to help you with your project!


Disadvantages of Pocket Doors

While pocket doors offer numerous advantages, they do come with certain disadvantages:

Maintenance: Sliding pocket doors may require more maintenance than traditional doors, especially in their tracking systems and hardware.

Sound Insulation: Due to their design, pocket doors do not seal as tightly as conventional doors, which can result in less effective sound insulation.

Installation Complexity: The process of installing a pocket door, especially in an existing wall, can be more complex and time-consuming than installing a standard door.

Limitations in Hardware and Locking Mechanisms: Pocket doors often have limited options when it comes to hardware and locking mechanisms, which can be a concern for those seeking high levels of security.

Start Your Pocket Door Installation Today!

Pocket door installation offers an innovative solution to space constraints, adding both functionality and aesthetic appeal to any room. Whether you are renovating an existing space or building a new one, understanding how to install a pocket door is essential.

By considering the structural requirements and potential limitations, one can effectively incorporate sliding pocket doors into their design, unlocking space and adding a modern touch to their interiors. Remember, while the process might seem daunting, the space-saving benefits and sleek look of a pocket door can be well worth the effort.

Monday, January 15, 2024

Step by Step Guide on How to Install Carpet Like a Pro


How to install carpet like a pro
HOME IMPROVEMENT & DIY

Step by Step Guide on How to Install Carpet Like a Pro

Installing carpet can transform the look and feel of a room, providing warmth, comfort, and a touch of elegance. While it may seem daunting, with the right tools and guidance, you can lay carpet yourself.  Whether you're a DIY expert or a first-timer, this guide will assist you in transforming your space with your new carpet.

Can You Lay Carpet Yourself?

Absolutely! Laying carpet yourself is a feasible DIY project. It requires patience, precision, and some physical effort, but with careful planning and attention to detail, you can achieve professional-looking results while staying within budget.

Understanding how to install carpet is not just about the physical act of laying the carpet down; it also involves preparation of the surface, choosing the right tools, and knowing the techniques for cutting and fitting the carpet.

how to lay carpet

How Often Should You Replace Carpet?

The lifespan of a carpet depends on its quality, usage, and maintenance. On average, carpets should be replaced every 5 to 15 years. However, high-traffic areas may need more frequent replacements. When considering a replacement, understanding how to install carpet is an important aspect of ensuring longevity and maintaining aesthetic appeal.

Regular cleaning and avoiding prolonged exposure to sunlight can also prolong a carpet's life. When it comes time for a replacement, choosing the right type of carpet and proper carpet installation techniques are key to ensuring it can withstand regular use and maintain its appearance over time.

Should You Install Baseboards Before or After Carpet?

It's generally recommended to install baseboards before laying the carpet. Doing so enables the carpet edges to be neatly tucked underneath the baseboards. This method not only creates a cleaner and more professional finish but also helps in protecting the edges of the carpet from wear and tear.

Additionally, installing baseboards first can prevent the carpet from fraying or pulling away at the edges, ensuring a more durable and aesthetically pleasing result. This approach simplifies the carpet installation process and enhances the overall appearance and longevity of your carpeting.


Looking for a FREE Quote?

Our Dumpster Consultants are waiting to help you find an affordable solution to your waste disposal needs; we can't wait to help you with your project!


Tools and Materials Needed

  • Carpet
  • Tackless strips
  • Carpet padding
  • Utility knife
  • Staple gun
  • Hammer
  • Measuring tape
  • Knee kicker
  • Carpet stretcher (power stretcher)
  • Seaming tape and iron
  • Wall trimmer

Step-by-Step Guide to Carpet Installation

1. Preparing the Room

If replacing an existing carpet, remove it along with the padding underneath. Ensure the floor is clean and smooth. Install Baseboards: If not already present, install baseboards around the room. This will give you a boundary to tuck the carpet edges into.

Measure the room accurately to determine how much carpet and padding you need. Always buy a little extra to account for mistakes or irregularities.

2. Installing Tackless Strips

Lay tackless strips along the perimeter of the room, leaving a gap of about ½ inch between the strips and the wall. Ensure the pins on the strips angle towards the wall.

3. Laying the Carpet Padding

Cut the padding to fit inside the tackless strip perimeter. The padding should not overlap the strips. Staple the padding down along the inside edge of the tackless strips.

4. Cutting the Carpet

Roll out the carpet in a clean, open area. Measure and cut the carpet according to the room's dimensions, allowing a few extra inches on each side for trimming.

5. Lay the Carpet

Roll out the carpet in the room, ensuring it overhangs evenly on all sides. Trim any excess carpet at the corners to make it easier to manage. Using the knee kicker, anchor one side of the carpet onto the tackless strips. The teeth of the knee kicker should grip the carpet about 1 inch from the wall.

Use the power stretcher to stretch the carpet across the room to the opposite set of tackless strips. This step is crucial for avoiding wrinkles and ensuring a tight fit.

6. Seaming (for Multiple Pieces)

If your room requires more than one piece of carpet, you'll need to seam them together. Use seaming tape underneath the joint and a seaming iron to heat the tape, joining the pieces securely.

7. Trimming and Finishing

Use a wall trimmer to cut the excess carpet along the walls. The carpet should fit snugly against the baseboards. Tuck the edges of the carpet into the gap between the tackless strips and the wall, creating a clean, finished look.

installing a carpet

Tips for Success

  • Take Your Time: Don't rush the process. Precision is key in carpet installation.
  • Keep Tools Handy: Having the right tools at your disposal can make the job much smoother.
  • Seek Help for Large Rooms: For larger rooms, consider getting an extra pair of hands to help with stretching and laying the carpet.

Get Started on Your Carpet Installation

Installing a carpet on your own can be a rewarding DIY project. By following these steps and paying attention to detail, you can achieve a professional-looking carpet installation that enhances the comfort and aesthetic of your space. Remember, regular maintenance and proper care will extend the life of your new carpet, making your effort well worth it in the long run.

Friday, December 15, 2023

A Comprehensive How To Guide on Garbage Disposal Installation

 HOME IMPROVEMENT & DIY

A Comprehensive How To Guide on Garbage Disposal Installation

Installing a garbage disposal can be a valuable upgrade to your kitchen, making food waste disposal more convenient and efficient. While the prospect of a garbage disposal installation may seem daunting at first, with the right tools and a systematic approach, it can be a relatively straightforward process.

In this guide, we'll walk you through the essential steps and answer common questions about installing a garbage disposal.

Tools and Equipment Needed:

Before embarking on your garbage disposal installation journey, gather the following tools and equipment:

  • Garbage disposal unit
  • Mounting assembly (usually included with the disposal)
  • Plumber's putty or silicone caulk
  • Screwdriver
  • Adjustable wrench
  • Plunger or disposal wrench
  • Hacksaw (if needed for cutting pipes)
  • Bucket or towel (for water cleanup)
  • Electrical tape or wire nuts
  • Electrical cable and outlet (if not pre-wired)
Garbage Disposal Installation

Step-by-Step Guide on How to Install a Garbage Disposal:

Step 1: Turn Off Power and Water - Before beginning the garbage disposal installation, turn off the power to the disposal at the circuit breaker and the water supply to the sink.

Step 2: Remove Existing Plumbing - Disconnect the existing plumbing from the sink's drain basket and, if applicable, remove the old disposal.

Step 3: Remove Old Mounting Assembly - Remove the mounting assembly from the old disposal or the sink.

Step 4: Install Mounting Assembly - Place the new mounting assembly onto the sink flange, securing it with provided screws. Apply plumber's putty or silicone caulk to create a watertight seal.

Step 5: Attach Disposal Unit - Hang the disposal unit on the mounting assembly by aligning the mounting tabs. Twist the disposal to lock it in place.

Step 6: Connect Disposal to Plumbing - Connect the discharge tube from the disposal to the sink's drain pipe. Trim the tube if necessary using a hacksaw.

Step 7: Connect Electrical Wiring - If not pre-wired, connect the electrical wiring according to the manufacturer's instructions. Secure connections with wire nuts or electrical tape.

Step 8: Secure the Disposal - Tighten the mounting assembly screws to secure the disposal in place.

Step 9: Test the Installation - Turn on the water supply and power to the disposal. Run water and turn on the disposal to check for leaks and proper operation.

Step 10: Final Checks - Check for leaks and ensure smooth, noise-free operation. Your garbage disposal is now ready for use!

Is it Hard to Install Your Own Garbage Disposal?

Installing a garbage disposal can be a manageable DIY project, especially with clear instructions and the right tools. While it requires some plumbing and electrical work, many homeowners find success with the installation process.

Taking the time to familiarize yourself with the components and carefully following the step-by-step guide provided can make the task less daunting. Additionally, the satisfaction of completing the installation on your own and the long-term convenience a garbage disposal brings to your kitchen make the effort worthwhile.


Looking for a FREE Quote?

Our Dumpster Consultants are waiting to help you find an affordable solution to your waste disposal needs; we can't wait to help you with your project!


Garbage Disposal Replacement

Garbage disposal replacement is a crucial step to maintain the efficiency of your kitchen's waste management system. Over time, Garbage disposal replacement may become necessary as units can wear out, encounter mechanical issues, or become outdated in terms of technology and energy efficiency.

The replacement process involves turning off the power and water supply, disconnecting the plumbing, and carefully uninstalling the existing unit. Once removed, the new Garbage disposal replacement is installed using a similar process to the initial installation. Homeowners might consider factors such as motor power, noise levels, and additional features when selecting a replacement disposal.

Upgrading to a newer model through Garbage disposal replacement not only ensures reliable performance but also introduces innovations that contribute to a more environmentally friendly and user-friendly kitchen experience. Regular maintenance and timely Garbage disposal replacement can extend the lifespan of your disposal unit, making it a worthwhile investment for a functional and efficient kitchen.

Do You Need a Special Sink to Install a Garbage Disposal?

Generally, garbage disposal installation can be done in most standard kitchen sinks. However, it's essential to check the compatibility of the disposal with your specific sink and follow the manufacturer's guidelines.

Some sinks may have unique configurations or materials that could impact the installation process. Checking the sink's specifications and ensuring it meets the requirements outlined by the disposal unit's manufacturer will help you avoid compatibility issues and ensure a smooth installation.

Garbage Disposal Installed

Are All Garbage Disposals Interchangeable?

Not all garbage disposals are interchangeable. The compatibility of a disposal unit depends on factors such as sink type, mounting configuration, and power requirements. While many disposals are designed to fit standard kitchen sinks, variations in design and features may affect interchangeability.

Always consult the product specifications provided by the manufacturer to determine if a particular disposal unit is suitable for your sink. When in doubt, seeking professional advice can help you make an informed decision, ensuring the chosen disposal is a perfect match for your kitchen setup.

An Effortless Job Well Done

Installing a garbage disposal can be a rewarding and achievable project with the right preparation and guidance. Following the steps outlined in this guide for a seamless garbage disposal installation or replacement process, and enjoying the benefits of a more convenient kitchen experience.

By taking the time to gather the necessary tools, carefully following the installation steps, and addressing any specific sink requirements, you can enhance your kitchen's functionality and reduce food waste effectively.

Whether you're a seasoned DIY enthusiast or a first-time installer, the process becomes more straightforward with a clear understanding of the installation steps and the compatibility factors involved.