Friday, December 15, 2023

A Comprehensive How To Guide on Garbage Disposal Installation

 HOME IMPROVEMENT & DIY

A Comprehensive How To Guide on Garbage Disposal Installation

Installing a garbage disposal can be a valuable upgrade to your kitchen, making food waste disposal more convenient and efficient. While the prospect of a garbage disposal installation may seem daunting at first, with the right tools and a systematic approach, it can be a relatively straightforward process.

In this guide, we'll walk you through the essential steps and answer common questions about installing a garbage disposal.

Tools and Equipment Needed:

Before embarking on your garbage disposal installation journey, gather the following tools and equipment:

  • Garbage disposal unit
  • Mounting assembly (usually included with the disposal)
  • Plumber's putty or silicone caulk
  • Screwdriver
  • Adjustable wrench
  • Plunger or disposal wrench
  • Hacksaw (if needed for cutting pipes)
  • Bucket or towel (for water cleanup)
  • Electrical tape or wire nuts
  • Electrical cable and outlet (if not pre-wired)
Garbage Disposal Installation

Step-by-Step Guide on How to Install a Garbage Disposal:

Step 1: Turn Off Power and Water - Before beginning the garbage disposal installation, turn off the power to the disposal at the circuit breaker and the water supply to the sink.

Step 2: Remove Existing Plumbing - Disconnect the existing plumbing from the sink's drain basket and, if applicable, remove the old disposal.

Step 3: Remove Old Mounting Assembly - Remove the mounting assembly from the old disposal or the sink.

Step 4: Install Mounting Assembly - Place the new mounting assembly onto the sink flange, securing it with provided screws. Apply plumber's putty or silicone caulk to create a watertight seal.

Step 5: Attach Disposal Unit - Hang the disposal unit on the mounting assembly by aligning the mounting tabs. Twist the disposal to lock it in place.

Step 6: Connect Disposal to Plumbing - Connect the discharge tube from the disposal to the sink's drain pipe. Trim the tube if necessary using a hacksaw.

Step 7: Connect Electrical Wiring - If not pre-wired, connect the electrical wiring according to the manufacturer's instructions. Secure connections with wire nuts or electrical tape.

Step 8: Secure the Disposal - Tighten the mounting assembly screws to secure the disposal in place.

Step 9: Test the Installation - Turn on the water supply and power to the disposal. Run water and turn on the disposal to check for leaks and proper operation.

Step 10: Final Checks - Check for leaks and ensure smooth, noise-free operation. Your garbage disposal is now ready for use!

Is it Hard to Install Your Own Garbage Disposal?

Installing a garbage disposal can be a manageable DIY project, especially with clear instructions and the right tools. While it requires some plumbing and electrical work, many homeowners find success with the installation process.

Taking the time to familiarize yourself with the components and carefully following the step-by-step guide provided can make the task less daunting. Additionally, the satisfaction of completing the installation on your own and the long-term convenience a garbage disposal brings to your kitchen make the effort worthwhile.


Looking for a FREE Quote?

Our Dumpster Consultants are waiting to help you find an affordable solution to your waste disposal needs; we can't wait to help you with your project!


Garbage Disposal Replacement

Garbage disposal replacement is a crucial step to maintain the efficiency of your kitchen's waste management system. Over time, Garbage disposal replacement may become necessary as units can wear out, encounter mechanical issues, or become outdated in terms of technology and energy efficiency.

The replacement process involves turning off the power and water supply, disconnecting the plumbing, and carefully uninstalling the existing unit. Once removed, the new Garbage disposal replacement is installed using a similar process to the initial installation. Homeowners might consider factors such as motor power, noise levels, and additional features when selecting a replacement disposal.

Upgrading to a newer model through Garbage disposal replacement not only ensures reliable performance but also introduces innovations that contribute to a more environmentally friendly and user-friendly kitchen experience. Regular maintenance and timely Garbage disposal replacement can extend the lifespan of your disposal unit, making it a worthwhile investment for a functional and efficient kitchen.

Do You Need a Special Sink to Install a Garbage Disposal?

Generally, garbage disposal installation can be done in most standard kitchen sinks. However, it's essential to check the compatibility of the disposal with your specific sink and follow the manufacturer's guidelines.

Some sinks may have unique configurations or materials that could impact the installation process. Checking the sink's specifications and ensuring it meets the requirements outlined by the disposal unit's manufacturer will help you avoid compatibility issues and ensure a smooth installation.

Garbage Disposal Installed

Are All Garbage Disposals Interchangeable?

Not all garbage disposals are interchangeable. The compatibility of a disposal unit depends on factors such as sink type, mounting configuration, and power requirements. While many disposals are designed to fit standard kitchen sinks, variations in design and features may affect interchangeability.

Always consult the product specifications provided by the manufacturer to determine if a particular disposal unit is suitable for your sink. When in doubt, seeking professional advice can help you make an informed decision, ensuring the chosen disposal is a perfect match for your kitchen setup.

An Effortless Job Well Done

Installing a garbage disposal can be a rewarding and achievable project with the right preparation and guidance. Following the steps outlined in this guide for a seamless garbage disposal installation or replacement process, and enjoying the benefits of a more convenient kitchen experience.

By taking the time to gather the necessary tools, carefully following the installation steps, and addressing any specific sink requirements, you can enhance your kitchen's functionality and reduce food waste effectively.

Whether you're a seasoned DIY enthusiast or a first-time installer, the process becomes more straightforward with a clear understanding of the installation steps and the compatibility factors involved.

Friday, November 24, 2023

Successful House Flippers: 10 Home Remodeler Hacks on How to Remodel Your Fixer Upper


How to Remodel Your Fixer Upper
HOME IMPROVEMENT & DIY

Successful House Flippers: 10 Home Remodeler Hacks on How to Remodel Your Fixer Upper

The art of house flipping involves more than just buying a property and selling it for a profit. Successful house flippers understand that the real magic lies in the quality and efficiency of the home remodel.

Remodeling a house fixer upper requires a blend of strategic planning, market understanding, and hands-on work. Whether you’re a seasoned flipper or a novice in the real estate game, mastering the art of home renovation is crucial. We delve into 10 essential hacks that will guide you on how to remodel your home effectively, ensuring that your investment reaps its maximum potential.

10 Home Remodeler Hacks To Remodel Your Home

1. Strategic Planning: The foundation of any successful house fixer upper remodel is thorough and strategic planning. For every house fixer upper, it's crucial to assess every corner of the property, identifying key areas that need improvement. Some renovations, particularly in kitchens and bathrooms, yield a better return on investment. It's essential to consider the current market trends and how they align with your house fixer upper remodeling plans. This approach not only saves time and money but also ensures that the remodel adds significant value to the property.

Remodeling Home

2. Budgeting Wisely: A critical aspect of successful house flipping is effective budget management. Allocate funds for each aspect of the remodel, and always have a contingency budget for unforeseen expenses. Prioritize renovations that enhance the property's value the most. Avoid unnecessary spending on lavish upgrades that don't offer a good return on investment. Successful house flippers often find creative ways to save costs without compromising quality.

3. Efficient Time Management: In the house flipping business, efficient time management can significantly impact your profitability. Develop a comprehensive timeline for the project and ensure that each phase of the remodel adheres to this schedule. Hiring reliable and efficient contractors is crucial to maintain this timeline. Delays can lead to increased holding costs, impacting your overall profit margin.

4. Prioritize Key Improvements: Key areas like kitchens and bathrooms often sell homes. Invest in high-quality fixtures, modern appliances, and contemporary designs to make these spaces stand out. Successful house flippers know that a well-designed kitchen or bathroom can significantly increase a home’s appeal and market value.

5. Curb Appeal Matters: The exterior of the property is the first thing potential buyers see. Enhance the home's curb appeal with attractive landscaping, a fresh coat of paint, and necessary repairs. Simple yet effective changes to the exterior can significantly increase the property’s market value and attract more buyers.

Home with Curb Appeal

6. DIY When Possible: Labor costs can consume a significant portion of your renovation budget. Undertake manageable tasks yourself, such as painting, minor repairs, or basic landscaping. This approach can save money, but it's important to know your limits. For complex tasks like electrical work or plumbing, it's always safer and more efficient to hire professionals.

7. Quality Over Quantity: Successful house flippers understand the importance of quality. While it might be tempting to cut costs by using cheaper materials or rushed labor, this can lead to problems down the line. High-quality renovations not only attract better offers but also prevent future complaints or legal issues from buyers.

8. Understand Your Market: Tailoring your remodel to fit the local market is a smart strategy. Research the neighborhood and understand the needs and preferences of potential buyers in that area. If the property is in a family-oriented neighborhood, for instance, focus on creating functional spaces for families. This market-driven approach ensures that your remodel appeals to the right audience.

9. Eco-Friendly Upgrades: Sustainability is increasingly important to today’s homebuyers. Incorporating eco-friendly features like energy-efficient appliances, solar panels, and sustainable materials can be a unique selling point. These features not only appeal to environmentally conscious buyers but also can improve the overall energy efficiency of the home, adding to its value.

10. Stage the Home: The final touch to any remodel is staging the home. This involves strategically arranging furniture and décor to showcase the home’s potential. A well-staged home helps buyers visualize themselves living in the space, often leading to quicker sales and higher offers. Investing in professional staging, or even doing it yourself with tasteful choices, can make a significant difference.

Staging your home

How to Remodel Your Home?

Successful house flippers understand that to effectively remodel a house fixer upper, starting with a clear scope and a well-planned budget is essential. This involves conducting thorough research and obtaining multiple quotes to find a reliable contractor experienced in transforming house fixer uppers.

Develop a detailed plan with realistic timelines, and ensure all necessary permits are secured in compliance with local regulations. Prioritize renovations in areas that yield the most significant impact, like kitchens and bathrooms, and choose quality materials for longevity.

Clear and consistent communication with your contractor is vital to ensure your house fixer upper remodel meets your expectations and adds substantial value.

When to Remodel Your Home?

Deciding when to remodel your home is crucial for successful house flippers. It's typically best to embark on a remodel when you are financially prepared and plan to enjoy the upgrades in your home.

Seasonal preferences lean towards spring and summer for better weather conditions, though off-seasons might offer economic advantages. Also, consider remodeling when essential updates are necessary for safety or efficiency, or if you're aiming to boost the home’s value for a future sale.


Looking for a FREE Quote?

Our Dumpster Consultants are waiting to help you find an affordable solution to your waste disposal needs; we can't wait to help you with your project!


How to Hire a Home Remodeling Contractor & What to Ask?

Choosing the right contractor is pivotal for a successful remodel, especially when tackling a house fixer upper. Start by seeking recommendations from friends, family, or online reviews. Once you have a list of potential contractors, verify their licenses, insurance, and check their references. During the interview process, ask detailed questions such as:

Experience and Specialization: How long have you been in business? Do you have experience with projects similar to mine?

Previous Projects: Can you provide a portfolio of past projects or references?

Licenses and Permits: Are you licensed and insured? Will you obtain the necessary permits for the project?

Project Timeline and Process: What is the expected timeline for this project? How do you handle changes or delays in the project?

Cost and Payment Terms: Can you provide a detailed written estimate? What are your payment terms?

Communication and Project Management: How will you communicate updates and progress? Who will oversee the project on-site?

Warranty and Post-Completion Services: Do you offer a warranty on your work? What is your policy for handling any issues that may arise after completion?

Hiring a Contractor

Becoming a Successful House Flipper

Embarking on the journey of house flipping can be both exciting and challenging. However, with these 10 essential hacks, you're well-equipped to tackle any home remodel project.

Remember, successful house flippers don't just focus on the aesthetic aspects; they consider the financial and practical implications of every decision. By planning strategically, prioritizing essential upgrades, and understanding your market, you can significantly increase your chances of a profitable flip.

Whether you’re looking to remodel your home for sale or personal use, these insights from successful house flippers will empower you to make informed, effective decisions, turning your fixer-upper into a true gem.

Friday, November 17, 2023

Transforming Your Attic: A Step-by-Step Guide to Finish an Attic


Transform your Attic
HOME IMPROVEMENT & DIY

Transforming Your Attic: A Step-by-Step Guide to Finish an Attic

 (modified Nov 17, 2023)

The attic, often relegated to a dark and dusty storage space, holds immense potential for homeowners looking to maximize their living space. Finishing an attic can be a game-changer, providing additional room for a bedroom, office, or recreational area. If you're considering this transformation, read on for a step-by-step guide on how to finish an attic.

Is it a Good Idea to Finish an Attic?

Before diving into the process, it's crucial to consider whether finishing your attic is a good idea for your home and lifestyle. The answer is often a resounding yes. A finished attic adds significant value to your property, increasing its square footage and enhancing its appeal to potential buyers. It can also serve as a practical solution for growing families or those in need of a home office.

Additionally, when you finish an attic, it provides the opportunity to unleash your creativity, offering a versatile space that can cater to various needs. Whether it becomes a tranquil reading nook, a vibrant playroom, or a secluded home gym, the possibilities are as endless as your imagination. This transformation not only elevates your home's aesthetics but also enhances its functionality, ensuring your attic is not just an overlooked space but a vital and cherished part of your living environment.

Finishing an Attic

How to Finish an Attic for Cheap?

Finishing an attic doesn't have to break the bank. With careful planning and strategic decisions, you can transform your attic into a functional space without draining your wallet. Here are some cost-effective tips:

DIY vs. Professional Help: Assess your DIY skills and the complexity of the project. While hiring professionals might seem expensive upfront, it can save you money in the long run by avoiding costly mistakes.

Use Existing Infrastructure: Work with the existing structure as much as possible. Utilize the natural shape of the attic, and avoid major structural changes that can escalate costs.

Optimize Insulation: Proper insulation is key to making your finished attic comfortable and energy-efficient. Consider using spray foam insulation or other cost-effective options that provide good thermal performance.

Recycle and Upcycle: Furnish your finished attic with pre-loved furniture or repurpose items from other areas of your home. This not only saves money but also adds character to the space.

Strategic Lighting: Maximize natural light to reduce the need for extensive electrical work. Skylights and well-placed windows can illuminate the attic, making it feel more spacious and inviting.

Finished Attic

How Do You Finish an Unfinished Attic?

Now that you've decided to proceed, here's a step-by-step guide to finishing an attic:

Assess the Space: Examine the attic's structure, checking for any signs of damage or necessary repairs. Measure the available space and plan the layout for your finished attic.

Insulation: Ensure proper insulation to regulate temperature. This is especially important for attics, as they can become too hot in the summer and too cold in the winter.

Flooring: Choose a suitable flooring material based on your budget and preferences. Laminate, engineered wood, or carpet tiles are popular choices.

Walls: Install drywall or paneling to create finished walls. Consider light colors to brighten the space.

Ceiling: Address the angled ceiling common in attics. Install a drop ceiling or use creative solutions like exposed beams for a stylish finish.

Electrical and Plumbing: Plan the placement of electrical outlets and lighting fixtures. Consider hiring a professional for any necessary plumbing work.

Heating and Cooling: Extend your home's HVAC system to include the finished attic. This ensures a comfortable temperature year-round.

Furnishings: Choose furniture that fits the space and serves its purpose. Consider built-in storage to maximize functionality.

Personal Touch: Add your personal touch with decor and accessories. Consider the attic's purpose—whether it's a guest room, home office, or entertainment space—and decorate accordingly.


Looking for a FREE Quote?

Our Dumpster Consultants are waiting to help you find an affordable solution to your waste disposal needs; we can't wait to help you with your project!


How Do You Determine if an Attic Can Be Finished?

Not every attic is a canvas ready for transformation. Assessing its potential involves key considerations. There are some elements you can evaluate to ensure that your attic is not just eligible for finishing but poised for a successful and functional metamorphosis.

Ceiling Height: A minimum ceiling height is essential for a comfortable finished space. Ideally, there should be at least 7 feet of clearance in the majority of the attic.

Structural Integrity: Ensure the attic's structure can support the additional weight of finished materials and furniture. Consult a structural engineer if needed.

Access: Assess the accessibility of the attic. A proper staircase or attic ladder is necessary for safety and convenience.

Windows and Ventilation: Adequate natural light and ventilation are crucial. If your attic lacks windows, consider adding skylights or dormer windows.

Building Codes: Check local building codes and permits required for finishing an attic. Compliance with regulations ensures a safe and legal transformation.

Finishing an attic is a rewarding project that adds value and functionality to your home. With careful planning, cost-effective choices, and attention to key considerations, you can turn your attic into a beautiful and practical space that complements your lifestyle. So, why let your attic remain a neglected storage space when it could be a cozy retreat or a functional extension of your home?

Friday, November 10, 2023

Compare The Best Waste Disposal Solutions Near You: Bin There Dump That vs. Waste Management vs. Junk King

 LIFESTYLE

Compare The Best Waste Disposal Solutions Near You: Bin There Dump That vs. Waste Management vs. Junk King

 (modified Nov 9, 2023)

In our constantly evolving world, the demand for the best waste disposal service that is both efficient and affordable has never been more crucial. With the continuous growth of communities, the volume of generated waste has increased, highlighting the importance of reliable services to handle and dispose of it responsibly.

This article delves into a comprehensive comparison of three leading waste solution providers—Bin There Dump That (BTDT), Waste Management (WM), and Junk King. The goal is to assess their offerings, affordability, and overall effectiveness, helping you make an informed decision when seeking the best waste disposal service for your specific needs.

Compare the Best Waste Disposal Solutions

What To Look For When Choosing the Best Waste Disposal Service

When selecting the best waste disposal service for your needs, several key factors warrant consideration. Firstly, assess the range of services offered by potential providers, ensuring they align with your specific waste management requirements. Look for a service that caters to various types of waste, be it residential, commercial, or industrial.

Affordability is another crucial aspect; seek transparent pricing models to avoid unexpected costs. Clear communication regarding any potential additional fees or charges ensures a hassle-free experience, allowing you to make informed decisions based on your budgetary considerations.

Consider the provider's reputation and customer reviews to gauge their reliability and efficiency in waste management. Timeliness and flexibility in scheduling pickups are vital, ensuring that the service can accommodate your timeline.

Ultimately, the best waste disposal service for you will be one that not only meets your immediate needs but also aligns with your values, providing a comprehensive and environmentally conscious solution to waste management.

Bin There Dump That: The Local Touch

Bin There Dump That stands out as a local waste solution provider that emphasizes community engagement and personalized service. With a focus on residential and construction waste removal, BTDT offers a range of bin sizes to accommodate diverse needs. Their commitment to prompt delivery, careful placement of bins, and efficient pickups sets them apart.

Affordability is a key factor for many seeking waste solutions, and Bin There Dump That takes pride in providing cost-effective services without compromising on quality. Local businesses often appreciate the personalized touch that comes with dealing with a community-focused company like BTDT.

Bin There Dump That Dumpster Rental

Waste Management: The Industry Giant

As an industry giant, Waste Management has a widespread presence, offering comprehensive waste solutions for residential, commercial, and industrial clients. With an extensive fleet and infrastructure, WM has the capacity to handle large-scale waste management needs efficiently.

Waste Management's suite of services includes curbside collection, recycling programs, and waste disposal. While they may be perceived as a larger, more corporate entity, their vast resources contribute to a seamless and organized waste management process.

However, some customers may find that the sheer size of the company can result in a less personalized experience.

Waste Management

Affordability is a mixed bag with Waste Management. While their scale allows for economies of scale and competitive pricing, some customers might find that the extensive range of services comes with a higher price tag than more localized alternatives.

Junk King: The Junk Removal Specialists

Junk King positions itself as a specialized waste solution provider, focusing primarily on junk removal services. Their team of professionals is equipped to handle a variety of items, from furniture and appliances to electronics and construction debris. Junk King's emphasis on manually removing items from your home makes them an attractive choice.

Affordability is a notable aspect of Junk King's appeal. Their transparent pricing model and commitment to fair and upfront quotes resonate with customers seeking a straightforward approach to waste removal.

While they may not offer the variety of services provided by Waste Management, Junk King excels in its niche of efficient and eco-friendly junk removal.

Junk King

Comparative Analysis Of The Best Waste Disposal Service

When it comes to choosing the right and most affordable waste solution, several factors come into play. Affordability, reliability, and the scope of services are paramount considerations for consumers and businesses alike.

Bin There Dump That's local touch offers a unique advantage for those who value community engagement and personalized service. The emphasis on prompt and careful waste removal can be especially appealing for residential customers and smaller businesses with specific needs.

Waste Management's extensive reach and comprehensive services make it an ideal choice for those with diverse and large-scale waste management requirements. While the size of the company may result in a less personal experience, the efficiency and reliability of their services are unparalleled.

Junk King's specialization in junk removal, coupled with their eco-friendly practices, makes them a standout choice for those looking to dispose of specific items responsibly. The transparent pricing model adds to their appeal, providing customers with a clear understanding of the costs involved.


Looking for a FREE Quote?

Our Dumpster Consultants are waiting to help you find an affordable solution to your waste disposal needs; we can't wait to help you with your project!


Choosing The Best Waste Disposal Service Near You

In the realm of waste solutions, the choice between Bin There Dump That, Waste Management, and Junk King ultimately depends on individual needs and preferences.

For those valuing a local touch and personalized service, Bin There Dump That emerges as a strong contender. Waste Management's industry dominance cater to a broader spectrum of customers, while Junk King's specialization in junk removal makes it an attractive option for those specifically looking to have someone in their home removing items.

As consumers navigate the landscape of waste solutions, it's essential to weigh the benefits and drawbacks of each provider against their unique requirements.

Whether it's the community-oriented approach of Bin There Dump That, the industry expertise of Waste Management, or the specialized services of Junk King, affordable waste solutions are within reach for those willing to explore the options available in their vicinity.

Friday, October 27, 2023

Autumn Garden Cleanup: Preparing Your Yard For The Winter Months


Autumn Garden Cleanup
OUTDOOR LIVING

Autumn Garden Cleanup: Preparing Your Yard for the Winter Months

As the vibrant hues of summer begin to fade, and the crisp air of autumn settles in, it's time to shift our focus to the autumn garden cleanup. October flowers and fall sun annuals may still be blooming, but the time has come to prepare your garden for the approaching winter months.

In this article, we'll discuss when to shut down your garden, whether or not you should leave plants in the garden over the winter, and what you should add to your garden in the fall. So, let's get started on ensuring your autumn garden remains healthy and vibrant even through the fall landscape.

Fall Garden Cleanup

When Should I Shut Down My Garden?

The timing of shutting down your garden largely depends on your location and local climate. In general, the autumn garden cleanup should begin when the first frost is on the horizon or after the temperatures consistently drop below freezing. However, October flowers and fall sun annuals can continue to thrive in the cooler temperatures, so you don't need to rush.

Remove Annuals and Spent Plants: Start by removing any annuals that have finished blooming, such as fall sun annuals. These plants will not survive the winter, and removing them will prevent diseases from overwintering in your garden.

Prune Perennials: Trim back your perennials to about 3-4 inches above the ground after the first frost. This encourages healthy growth in the spring and prevents disease and pests from taking hold during the winter.

Clean Up Debris: Rake up fallen leaves, twigs, and other debris from your garden beds. This helps prevent the buildup of fungal diseases and provides a tidier look for your garden.

Divide and Transplant: Fall is an excellent time to divide and transplant perennials if needed. This gives them time to establish their roots before winter.

Mulch Beds: Apply a layer of mulch to your autumn garden beds to help regulate soil temperature and moisture levels during the winter months.


Looking for a FREE Quote?

Our Dumpster Consultants are waiting to help you find an affordable solution to your waste disposal needs; we can't wait to help you with your project!


Should I Leave Plants in My Autumn Garden Over Winter?

Leaving some plants in your autumn garden over the winter can be beneficial, especially if they are perennials or hardy shrubs. Here are some guidelines to help you decide which plants to leave and which to protect or move indoors:

Hardy Perennials: Perennials that are hardy in your zone can usually stay in the garden. However, it's a good idea to mulch around their base to provide extra insulation.

Shrubs and Trees: Established shrubs and trees can typically remain in the garden. Be sure to water them well in the fall to ensure they go into winter hydrated.

Tender Perennials: If you have tender perennials or non-hardy plants like tropicals, consider moving them indoors or providing winter protection, such as wrapping them in burlap or adding a layer of mulch.

Potted Plants: If you have potted plants, bring them indoors or place them in a sheltered area to protect them from freezing temperatures.

Bulbs: Bulbs like tulips and daffodils can stay in the ground but benefit from a layer of mulch to insulate them from extreme cold.

Remember that proper winter preparation is essential for the plants you leave in your garden. Mulch, watering, and providing wind protection can all help plants survive the winter months.

Autumn Garden

What Should I Add to My Garden in the Fall?

While fall is primarily a time for garden cleanup and preparation, there are still some tasks you can undertake to improve your garden's health and beauty:

Plant Spring-Blooming BulbsFall is the ideal time to plant spring-flowering bulbs like tulips, daffodils, and crocuses. These bulbs need the cold winter months to develop and bloom in the spring.

Cool-Season Vegetables: Consider planting cool-season vegetables like lettuce, spinach, kale, and carrots in your garden. These crops thrive in the cooler temperatures of autumn and can provide you with fresh produce well into the fall as well as vibrant greens to your fall landscape.

Garlic and Onions: Plant garlic and onion bulbs in the fall for a bountiful harvest the following year. They require a long growing season, so getting them in the ground early is essential.

Cover Crops: If you have empty garden beds, consider planting cover crops like clover or rye. Cover crops help improve soil health, prevent erosion, and suppress weeds.

Trees and Shrubs: Fall is an excellent time to plant new trees and shrubs. The cooler temperatures and increased rainfall give them a chance to establish their root systems before the heat of summer.

The Importance of an Autumn Garden Cleanup

As the fall sun annuals continue to bloom and the October flowers add their vibrant colors to your garden, don't forget the importance of autumn garden cleanup. Knowing when to shut down your garden and how to prepare it for the winter months is essential for maintaining a healthy and beautiful garden year-round.

While some plants can stay in the garden, others may need special care or protection, and adding certain elements like spring-blooming bulbs can enhance the beauty of your garden in the seasons to come. So, roll up your sleeves, grab your gardening tools, and make the most of the fall landscape as you prepare your garden for winter's embrace.

Friday, October 20, 2023

Fall Cleaning Checklist: Simplify Your Cleaning For Busy Days


Fall cleaning checklist
HOME ORGANIZATION & DECLUTTERING

Fall Cleaning Checklist: Simplify Your Cleaning for Busy Days

As the leaves change colors and the air turns crisp, it's time to start thinking about getting your home ready for fall. Just as spring cleaning breathes new life into your home after a long winter, fall cleaning helps you prepare for the colder months ahead.

But with busy schedules and daily responsibilities, it can be challenging to find the time and energy for a thorough cleaning. That's why we've put together a Fall Cleaning Checklist to simplify your cleaning tasks and ensure you're well-prepared for the autumn season.

Fall Cleaning Checklist

What is Involved in a Fall Cleanup?

A fall cleanup is about more than just dusting and vacuuming. It's a comprehensive approach to preparing your home for the unique challenges that autumn can bring. Here are some essential tasks to include in your fall cleaning checklist:

Gutter Cleaning: Start at the top by cleaning your gutters of leaves and debris. Clogged gutters can lead to water damage and ice dams during the winter.

Inspect Your Roof: Check for any loose or damaged shingles and address any issues before the harsh winter weather sets in.

Window Cleaning: Clean both the inside and outside of your windows to maximize natural light during the shorter days of fall and winter.

Deep Clean Carpets and Upholstery: Give your carpets and upholstered furniture a deep clean to remove summer dirt and allergens before you close up your home for the season.

HVAC Maintenance: Replace your furnace filter, clean your air ducts, and schedule a professional HVAC inspection to ensure your heating system is in top shape.

Seal Gaps and Cracks: Prevent drafts by sealing gaps around windows, doors, and other openings to keep your home cozy and energy-efficient.

Clean and Store Outdoor Furniture: Clean and properly store your outdoor furniture to protect it from the elements.

Check Smoke and Carbon Monoxide Detectors: Ensure your safety by testing and replacing batteries in your smoke and carbon monoxide detectors.

Declutter: Fall is an excellent time to declutter your home and make space for indoor activities during the colder months.

When Should You Do Fall Cleaning?

When getting ready for fall, the timing of your fall cleaning can fluctuate depending on your climate. However, as a general guideline, it's advisable to commence in late summer or early fall. Beginning your fall cleaning during this period allows for sufficient time to tackle all the necessary tasks before winter weather sets in.

It's a smart strategy to aim for completion at least a few weeks prior to the arrival of the first frost, providing you with a comfortable buffer to accommodate any unforeseen delays that may arise.

Raking the Fallen Leaves

How Do I Deep Clean My House for Fall? A Fall Cleaning Checklist!

Deep cleaning for fall involves thorough and systematic cleaning of various areas in your home. Here's a step-by-step guide to help you get started:

Create a Cleaning Schedule: Break down your cleaning tasks into manageable chunks and assign specific dates or weekends to each task. This will prevent you from feeling overwhelmed and help you stay organized.

Gather Supplies: Make sure you have all the cleaning supplies you need, including cleaning solutions, brushes, vacuum cleaner, mop, and safety equipment.

Start from the Top: Begin cleaning from the highest point in your home, such as the attic or top floor, and work your way down. This way, dust and debris will fall to lower areas that you haven't cleaned yet.

Focus on Specific Areas: Pay special attention to high-traffic areas, kitchens, bathrooms, and bedrooms. Clean appliances, countertops, sinks, and toilets thoroughly.

Windows and Glass: Clean windows inside and out, including window sills and frames. Use a streak-free glass cleaner for a sparkling finish.

Flooring: Vacuum and mop all your floors, and consider deep cleaning carpets and rugs.

Furniture and Upholstery: Dust and clean your furniture, including under cushions and in crevices.

Declutter as You Go: While cleaning, take the opportunity to declutter. Donate or discard items you no longer need.

Outdoor Areas: Don't forget your outdoor spaces. Clean and store outdoor furniture, and address any landscaping or yard maintenance.

Inspect and Replace: As you clean, inspect your home for any needed repairs or replacements. This could include damaged weatherstripping, leaky faucets, or broken tiles.


Looking for a FREE Quote?

Our Dumpster Consultants are waiting to help you find an affordable solution to your waste disposal needs; we can't wait to help you with your project!


What Should I Clean Before Fall?

Prior to embarking on your fall cleaning checklist, it's crucial to pinpoint specific areas that demand special attention with the changing seasons. Start by cleaning and storing away your summer clothing, beach towels, and outdoor gear, creating space for your fall and winter attire. If you have a fireplace, it's wise to schedule a professional chimney sweep to eliminate creosote buildup, ensuring its safe use during the colder months.

Take the time to clean and store your lawn mowers, grills, and other outdoor equipment properly to prevent damage throughout the winter season. Lastly, don't forget to replace outdoor light bulbs and assess indoor lighting to ensure it's adequate for the approaching darker months.

Fall Cleaning the Couch

How Do You Declutter in the Fall?

Decluttering plays a vital role in fall cleaning, and to do it effectively, you should start by setting clear goals for your efforts. Whether you're aiming to create more space, reduce stress, or simply get organized, having a purpose in mind will guide your decluttering process. It's best to take things one step at a time by focusing on a single room or area to avoid feeling overwhelmed.

When sorting through your belongings, categorize them into groups like keep, donate, sell, or discard, and be honest with yourself about what you genuinely need and use. Consider giving gently used items to local charities or selling them either online or at a garage sale. Don't forget to address storage spaces like closets and drawers to make accessing your belongings easier.

Lastly, establishing a regular maintenance routine after decluttering is key to preventing clutter from piling up once again.

Fall cleaning is an important seasonal task that prepares your home for the colder months ahead. By following a well-organized Fall Cleaning Checklist and breaking down tasks into manageable steps, you can simplify the process and ensure your home is clean, comfortable, and ready for the autumn season. So, grab your cleaning supplies, put on your favorite fall playlist, and get started on your fall cleaning journey today!

Friday, October 13, 2023

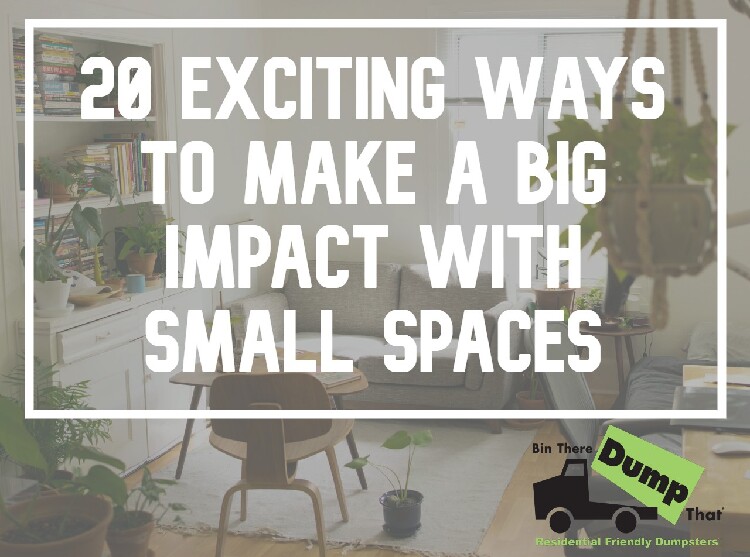
20 Exciting Ways To Make A Big Impact With Small Spaces


Small spaces
HOME IMPROVEMENT & DIY

20 Exciting Ways to Make a Big Impact with Small Spaces

In today's world, where urban living spaces are shrinking and minimalism is on the rise, making the most out of small spaces has become a necessity. Whether you're living in a cozy apartment, downsizing, or just looking to optimize a small room, there are numerous ways to create a stylish and functional environment. In this article, we will explore 20 exciting ways to make a big impact with small spaces, covering small home renovation ideas, designing strategies, and tips for maximizing the potential of your limited square footage.

Small spaces

1. Open Concept Design: Knock down unnecessary walls to create an open and airy feeling within your small spaces. This can make your home look and feel larger, as it allows natural light to flow freely and promotes better traffic flow between rooms. Just be sure the walls you plan to take down are not load bearing walls.

2. Multi-Functional Furniture: Invest in furniture that serves multiple purposes, such as a sofa bed, a dining table with storage, or an ottoman that doubles as a coffee table. These versatile pieces help you maximize utility without sacrificing style.

3. Vertical Storage: Utilize vertical space with shelves, wall-mounted cabinets, and floating bookshelves. This not only saves floor space but also adds an interesting visual element to your decor, making use of often overlooked areas.

4. Mirrors: Mirrors can create an illusion of a larger space by reflecting light and visually expanding the room. Consider mirrored closet doors or a statement mirror on the wall to brighten up your small spaces.

5. Light Colors: Opt for light and neutral color palettes for walls, furniture, and decor. Light colors make a room feel open and inviting, and they serve as a versatile backdrop for various design elements.

Vertical storage in small spaces

6. Under-Stair Storage: If you have stairs in your small home, consider adding storage underneath. This is a clever way to maximize space that is often overlooked and turn an otherwise wasted area into a valuable storage solution.

7. Fold-Down Furniture: Tables and desks that can be folded down when not in use are excellent space-saving solutions. They provide functionality when needed and fold away discreetly to free up floor space.

8. Sliding Doors: Replace traditional doors with sliding doors to save space. This is particularly useful for closets and bathrooms, as it eliminates the need for door swing clearance, making the room more efficient.

9. Built-In Furniture: Custom-built furniture can be tailored to fit your space perfectly, making the most of every inch. This approach allows you to optimize storage and functionality to your exact needs.

10. Use Nooks and Corners: Transform awkward nooks and corners into functional spaces by adding built-in seating, bookshelves, or even a small workstation. These areas can become cozy and purposeful nooks in your home.

small home renovation ideas

11. Opt for Minimalist Decor: Keep decorations simple and clutter-free. A minimalist approach can make small spaces feel more open and peaceful, allowing your carefully selected decor to shine without overwhelming the space.

12. Smart Storage Solutions: Invest in storage bins, baskets, and organizers to keep your belongings neat and tidy. Consider storage solutions that can be tucked under beds or sofas for efficient organization.

13. Compact Appliances: Choose smaller appliances and kitchen gadgets to save counter and cabinet space. Compact appliances can be just as efficient as their larger counterparts, making your kitchen more functional.

14. Use Glass and Lucite: Transparent materials like glass and lucite can create an illusion of more space. Glass tables and lucite chairs can be elegant additions to your decor, adding a touch of sophistication while maintaining a sense of openness.

15. Maximize Natural Light: Keep window treatments minimal to allow as much natural light in as possible. Natural light makes a space feel brighter and more open, creating a welcoming and refreshing atmosphere.

Natural light in small spaces

16. Multi-Level Shelving: Install multi-level shelves or floating shelves to display decorative items and plants without taking up valuable floor space. These shelves not only maximize storage but also serve as design features.

17. Fold-Out Desk: If you need a workspace, consider a fold-out desk that can be hidden when not in use. This innovative solution keeps your work area discreet and clutter-free, ideal for small home offices.

18. Optical Illusions: Use patterns and lines to create visual depth in your small space. Vertical stripes, for example, can make ceilings appear higher, giving the illusion of a taller room and a more expansive feel.

19. Compact Appliances: When renovating a small kitchen, choose smaller appliances and maximize counter space by installing pull-out cutting boards and additional surfaces. These space-saving features enhance functionality while optimizing your kitchen's layout.

20. Dual-Purpose Rooms: If your small spaces are multipurpose, use furniture and room dividers to create distinct zones for different activities. For example, a room can serve as a living room by day and a bedroom by night, offering flexibility and efficient use of space.

Looking for a FREE Quote?

Our Dumpster Consultants are waiting to help you find an affordable solution to your waste disposal needs; we can't wait to help you with your project!


Renovating and designing a small space can be both challenging and rewarding. With the right approach and a dash of creativity, you can make a big impact with even the smallest of spaces. By implementing these 20 exciting ideas, you'll not only optimize your space but also create a stylish and functional home that reflects your personal taste. Remember that small spaces can be cozy, efficient, and filled with character when designed thoughtfully. So, embrace the possibilities and transform your small space into a haven of comfort and style.